

















































 Home
Home
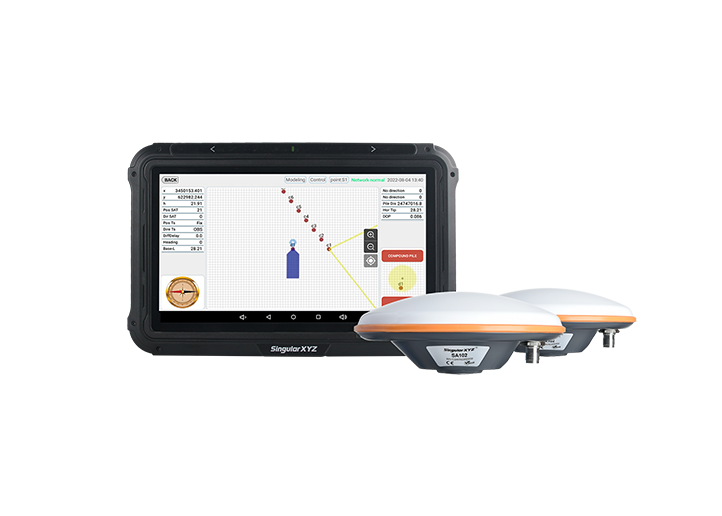
SingularPad Field Surveying Software
learn more





 2026-08-17
 Linden


In RTK fieldwork, the primary focus is typically on the coordinate accuracy and coverage completeness of measured points. However, beyond "which points were surveyed," "how those points were reached" is equally valuable information — it helps you review your workflow, verify area coverage, and even provides supporting evidence for subsequent quality checks.
SingularPad's track recording feature automatically logs the receiver's movement path during measurement, helping field crews review their workflow and verify area coverage. In the latest version of SingularPad, we have further introduced a track export feature that supports exporting tracks to KML or TXT format for viewing and analysis in other software.
Note: Track export is a newly added feature in the latest version and may not be available to all users yet. If you would like to use this feature, please contact our support team to request a version update.
In this chapter, we will introduce the basics of track recording and walk through the steps to configure, record, and export tracks in SingularPad.
Track recording refers to the system's automatic collection of position points at fixed time intervals as the receiver moves continuously over a period of time. These points form a time-ordered sequence that, when connected, represents the actual route traveled by the field operator.
Unlike measurement points — which capture the result at a single location — a track records a continuous dynamic process. Within the same project, the two operate independently: measurement points can be collected while track recording runs in the background.
This mechanism offers several practical advantages:
Workflow review: After recording, you can replay the route to confirm whether any areas were missed.
Coverage verification: Visually inspect the actual coverage of your survey area to avoid blind spots.
Data reuse: Export to standard formats for import into Google Earth, QGIS, or other third-party software for further analysis.
The following tutorial uses Point Survey mode as an example to demonstrate how to add the track recording function to the toolbar and configure its parameters.
After launching the software with a device connected, navigate to the Point Survey page.
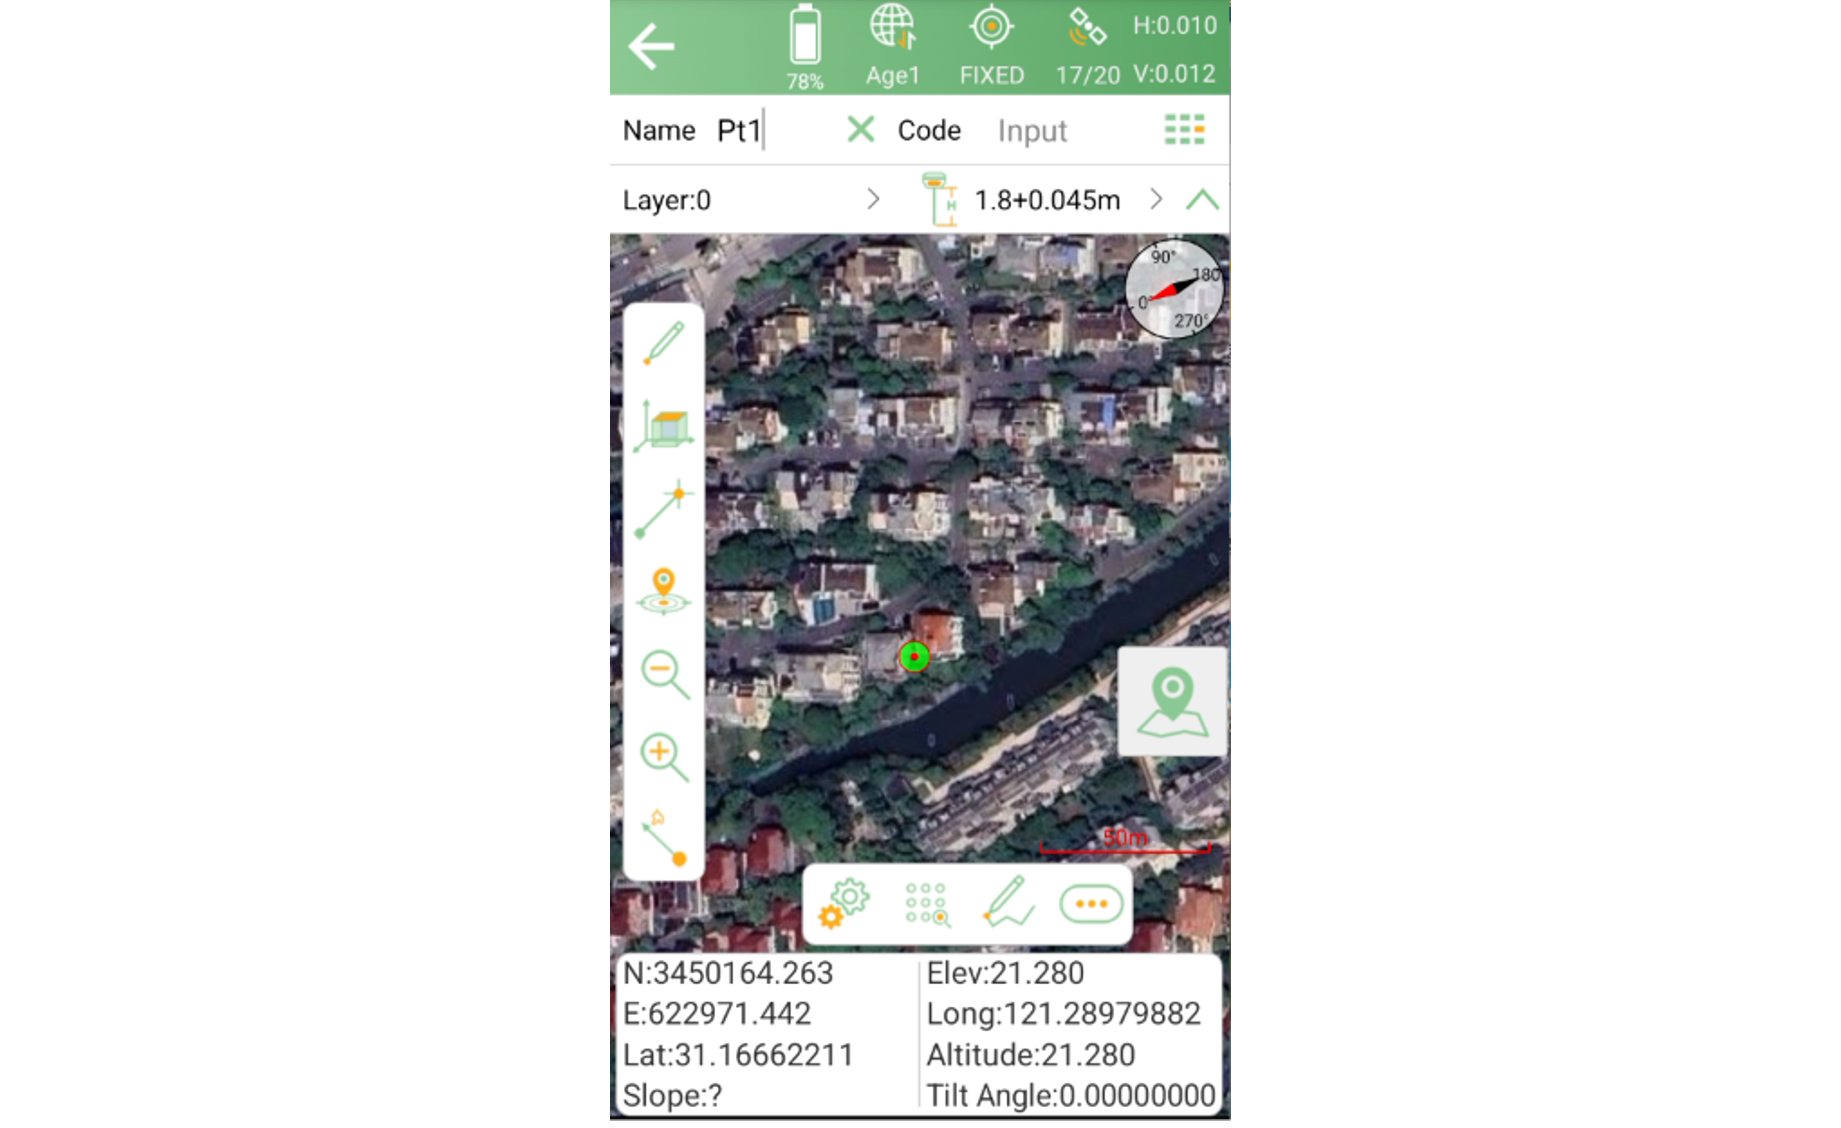
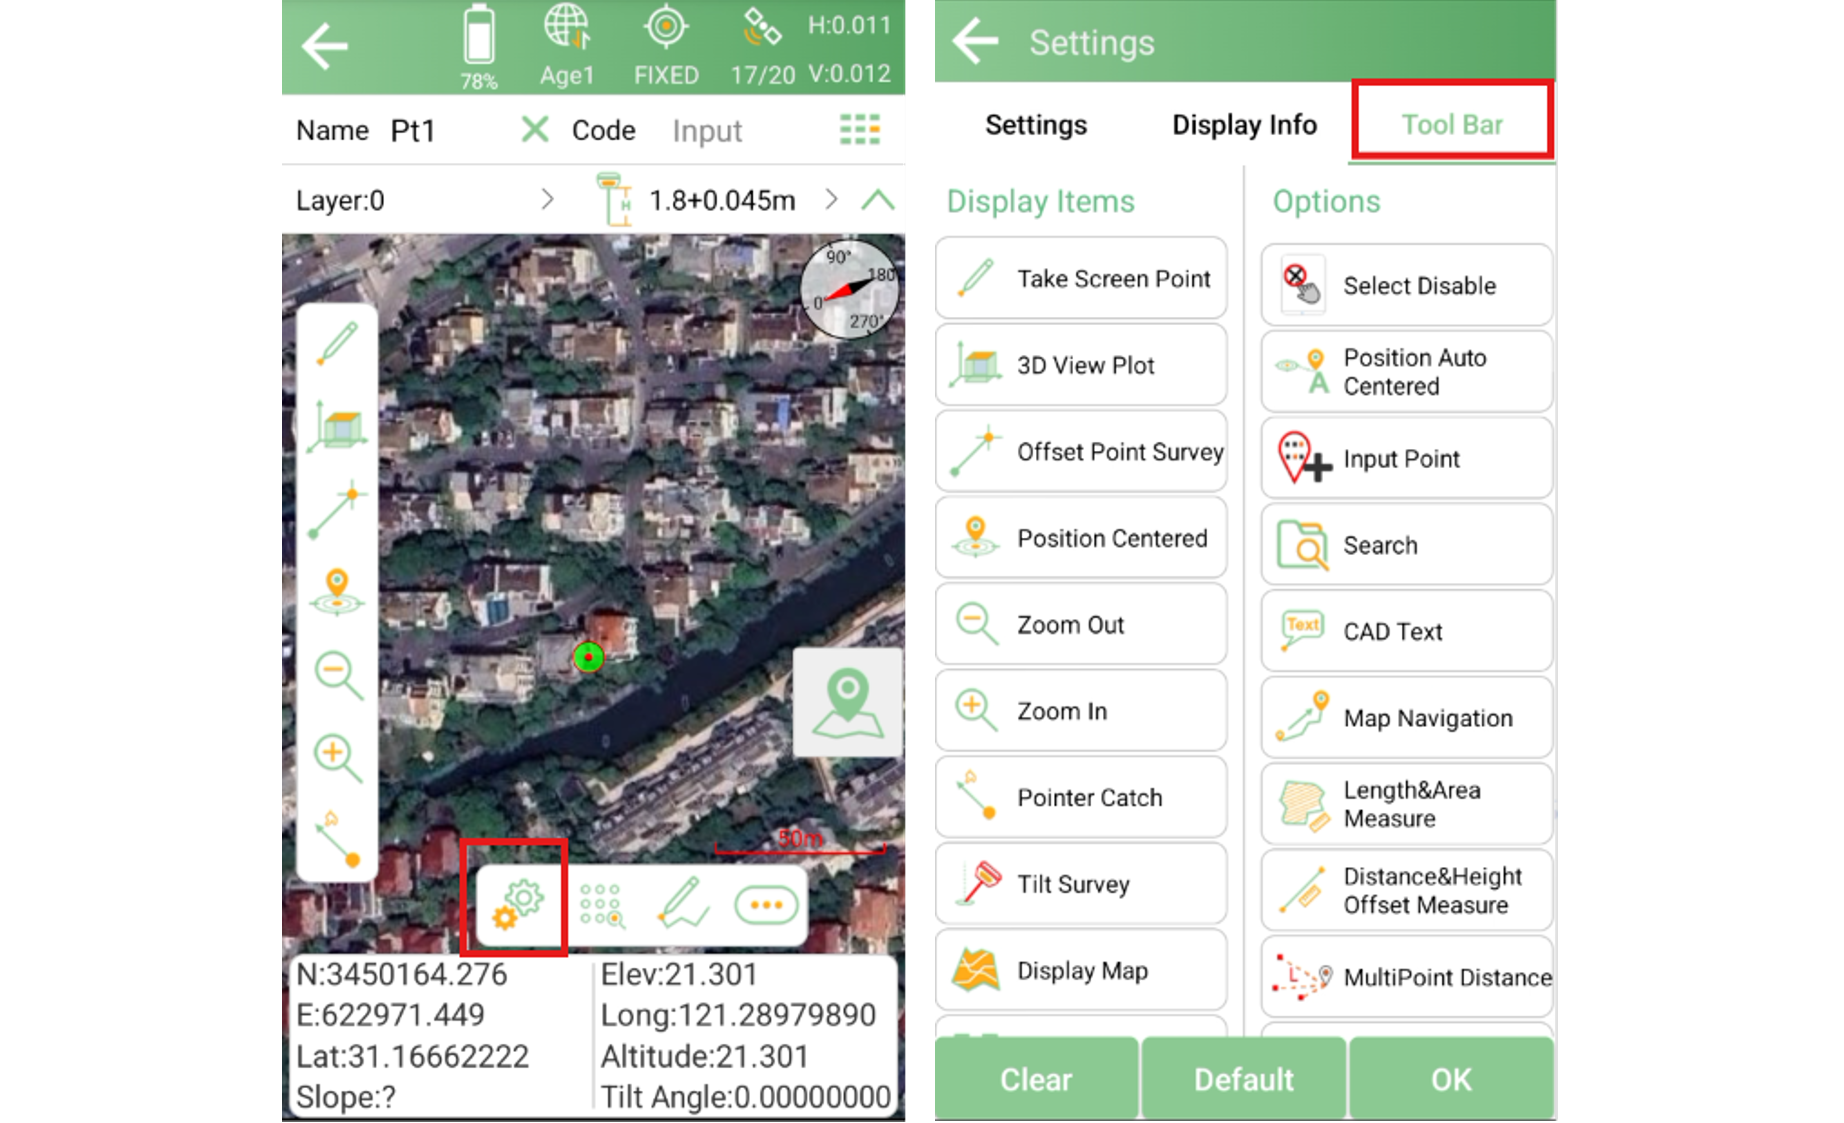
Tap the Settings button at the bottom of the screen, then select the Toolbar option on the settings page.
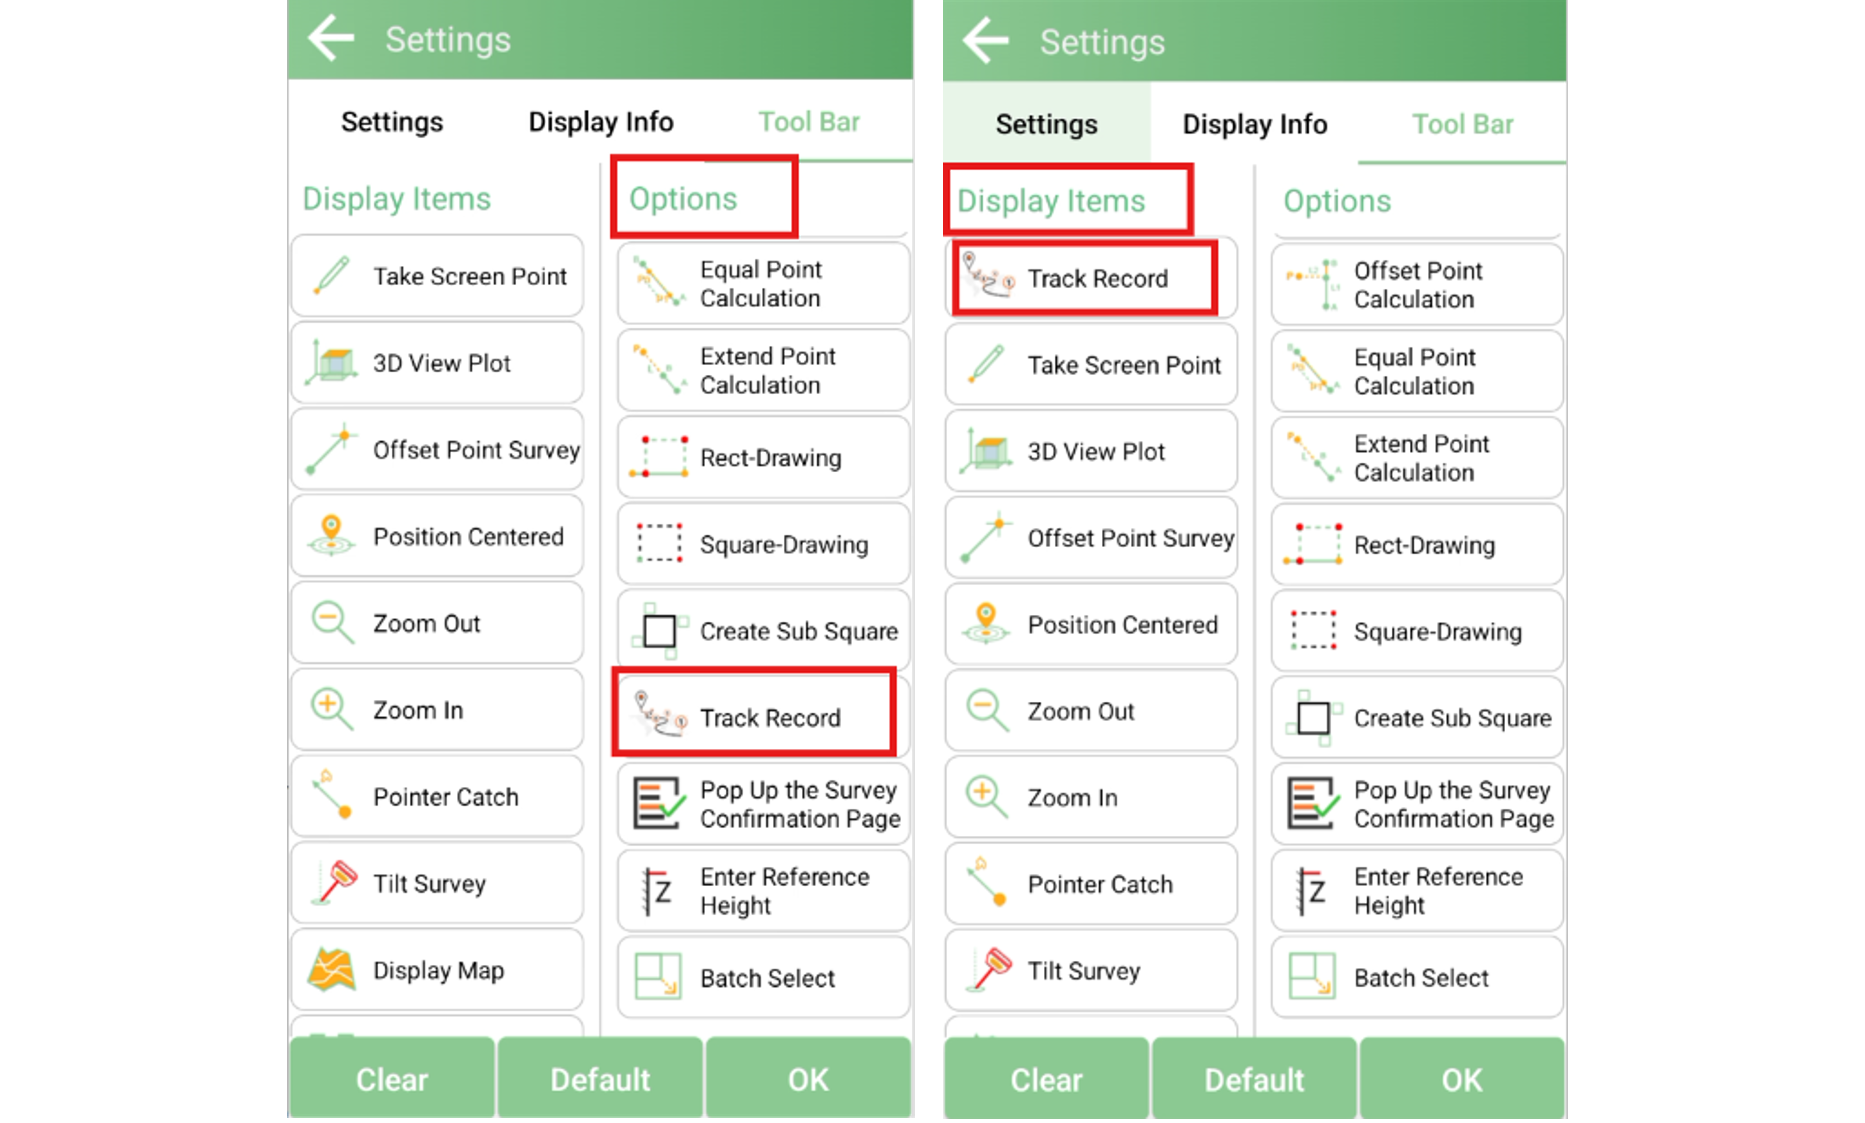
Scroll down through the options on the right side until you find Track Record. Tap it to add it to the Display Items list on the left. You can drag the items up or down to rearrange their order as needed. Once finished, tap OK in the lower-right corner to save.
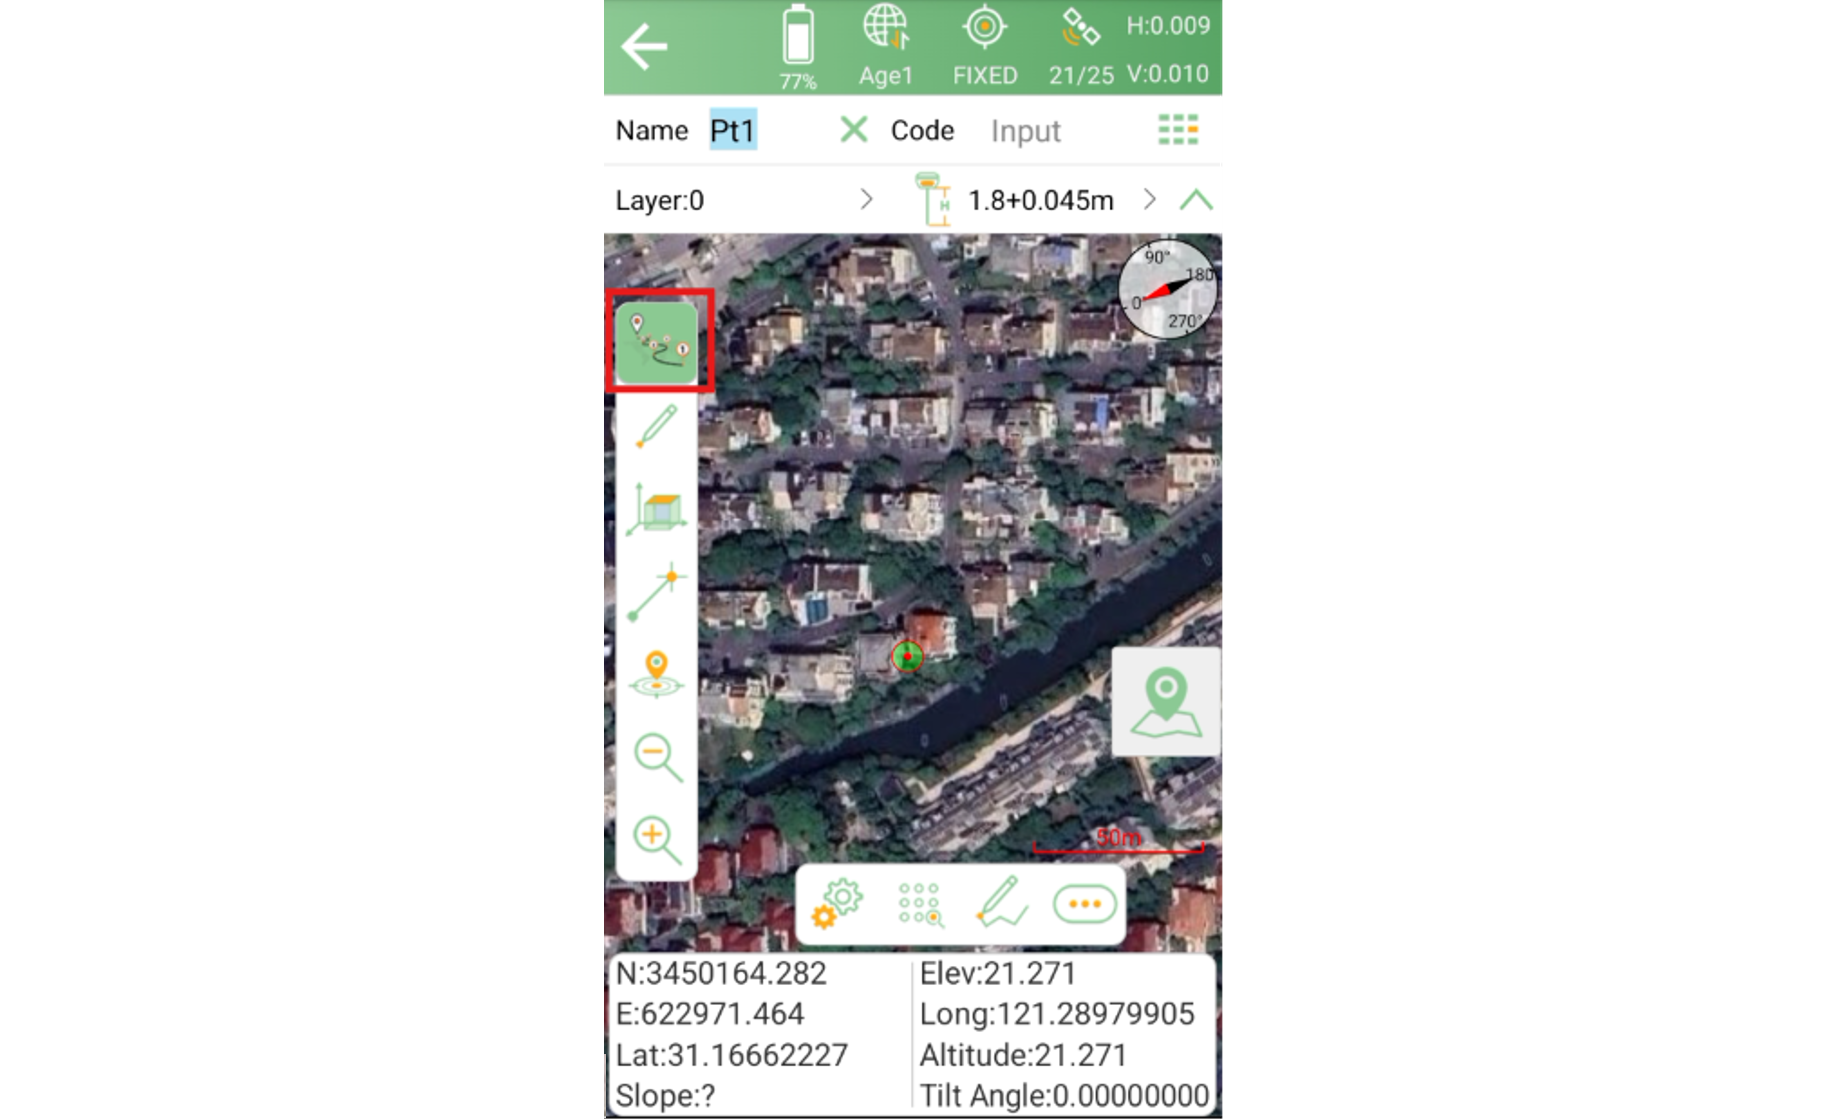
Return to the Point Survey screen — the track recording icon should now appear in the left toolbar. Tap it to open the parameter configuration dialog.
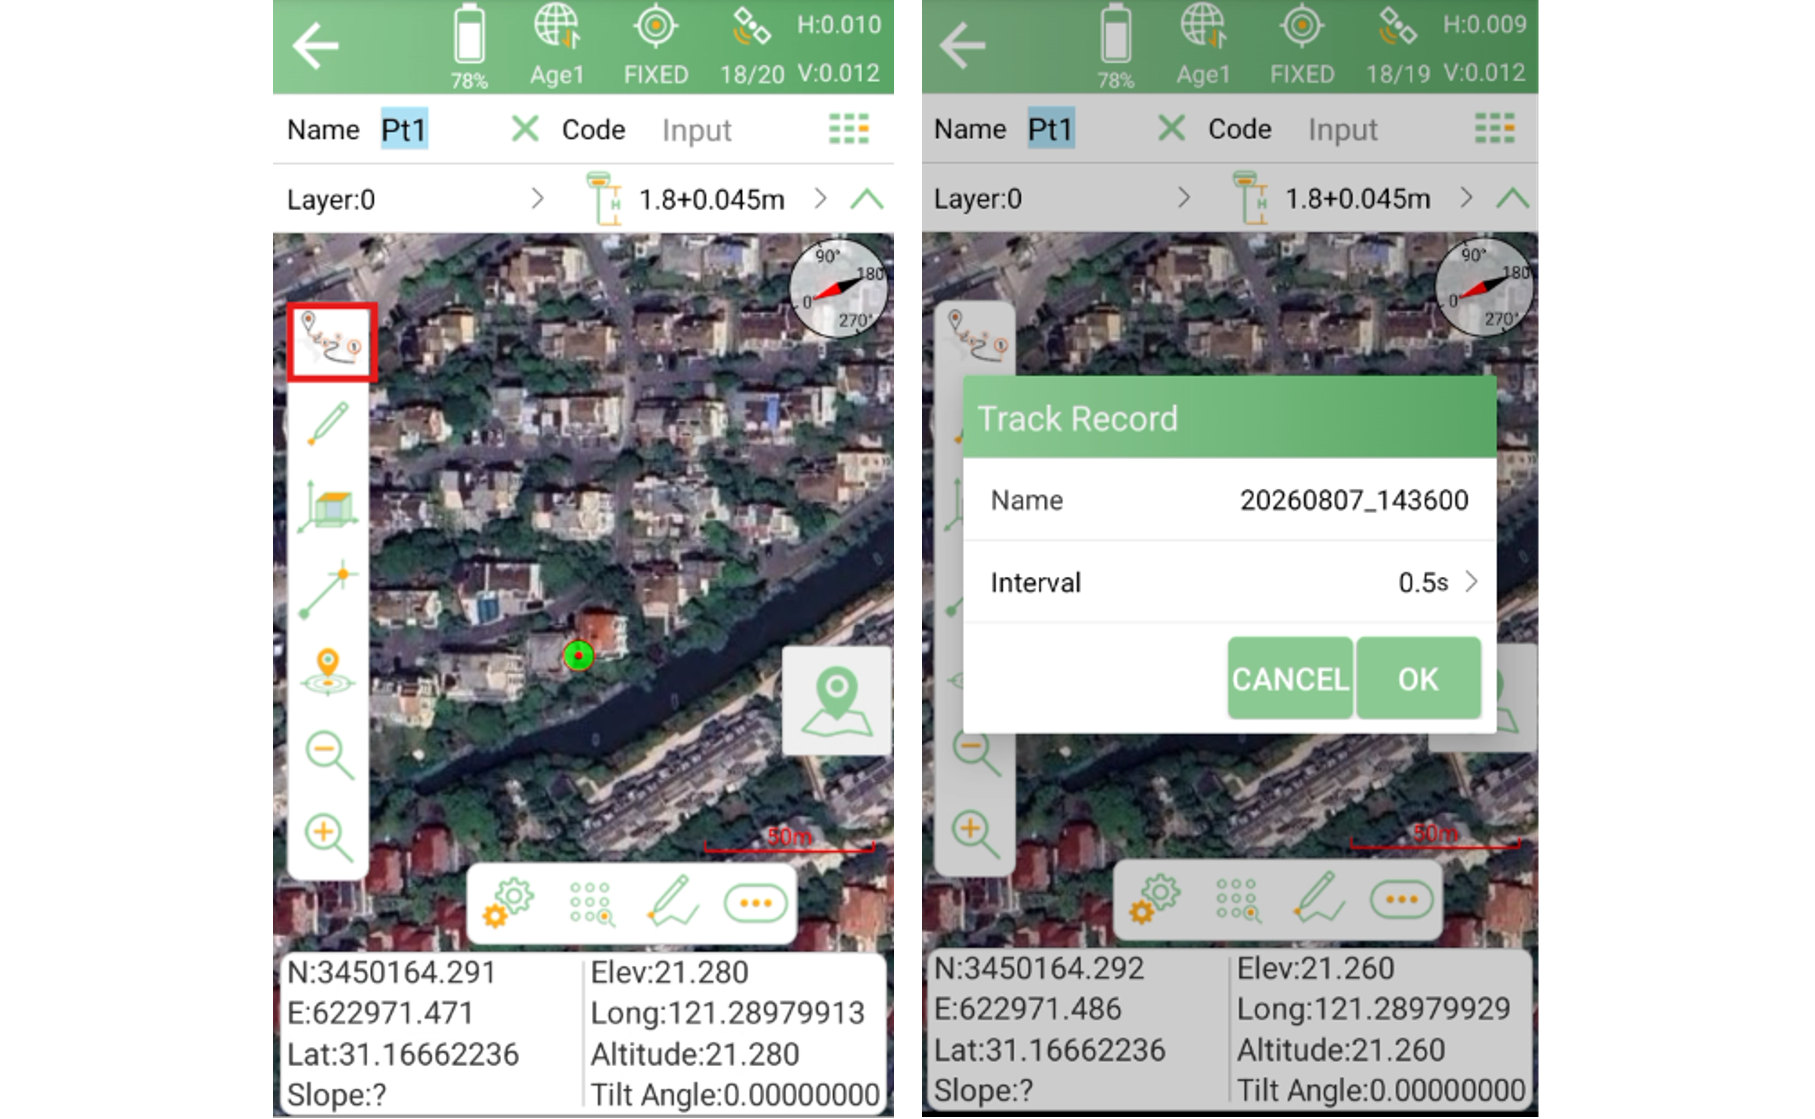
In the dialog, you can set the following:
Track name: Assign a recognizable name for this track recording.
Recording interval: The system will automatically collect track points at this interval.
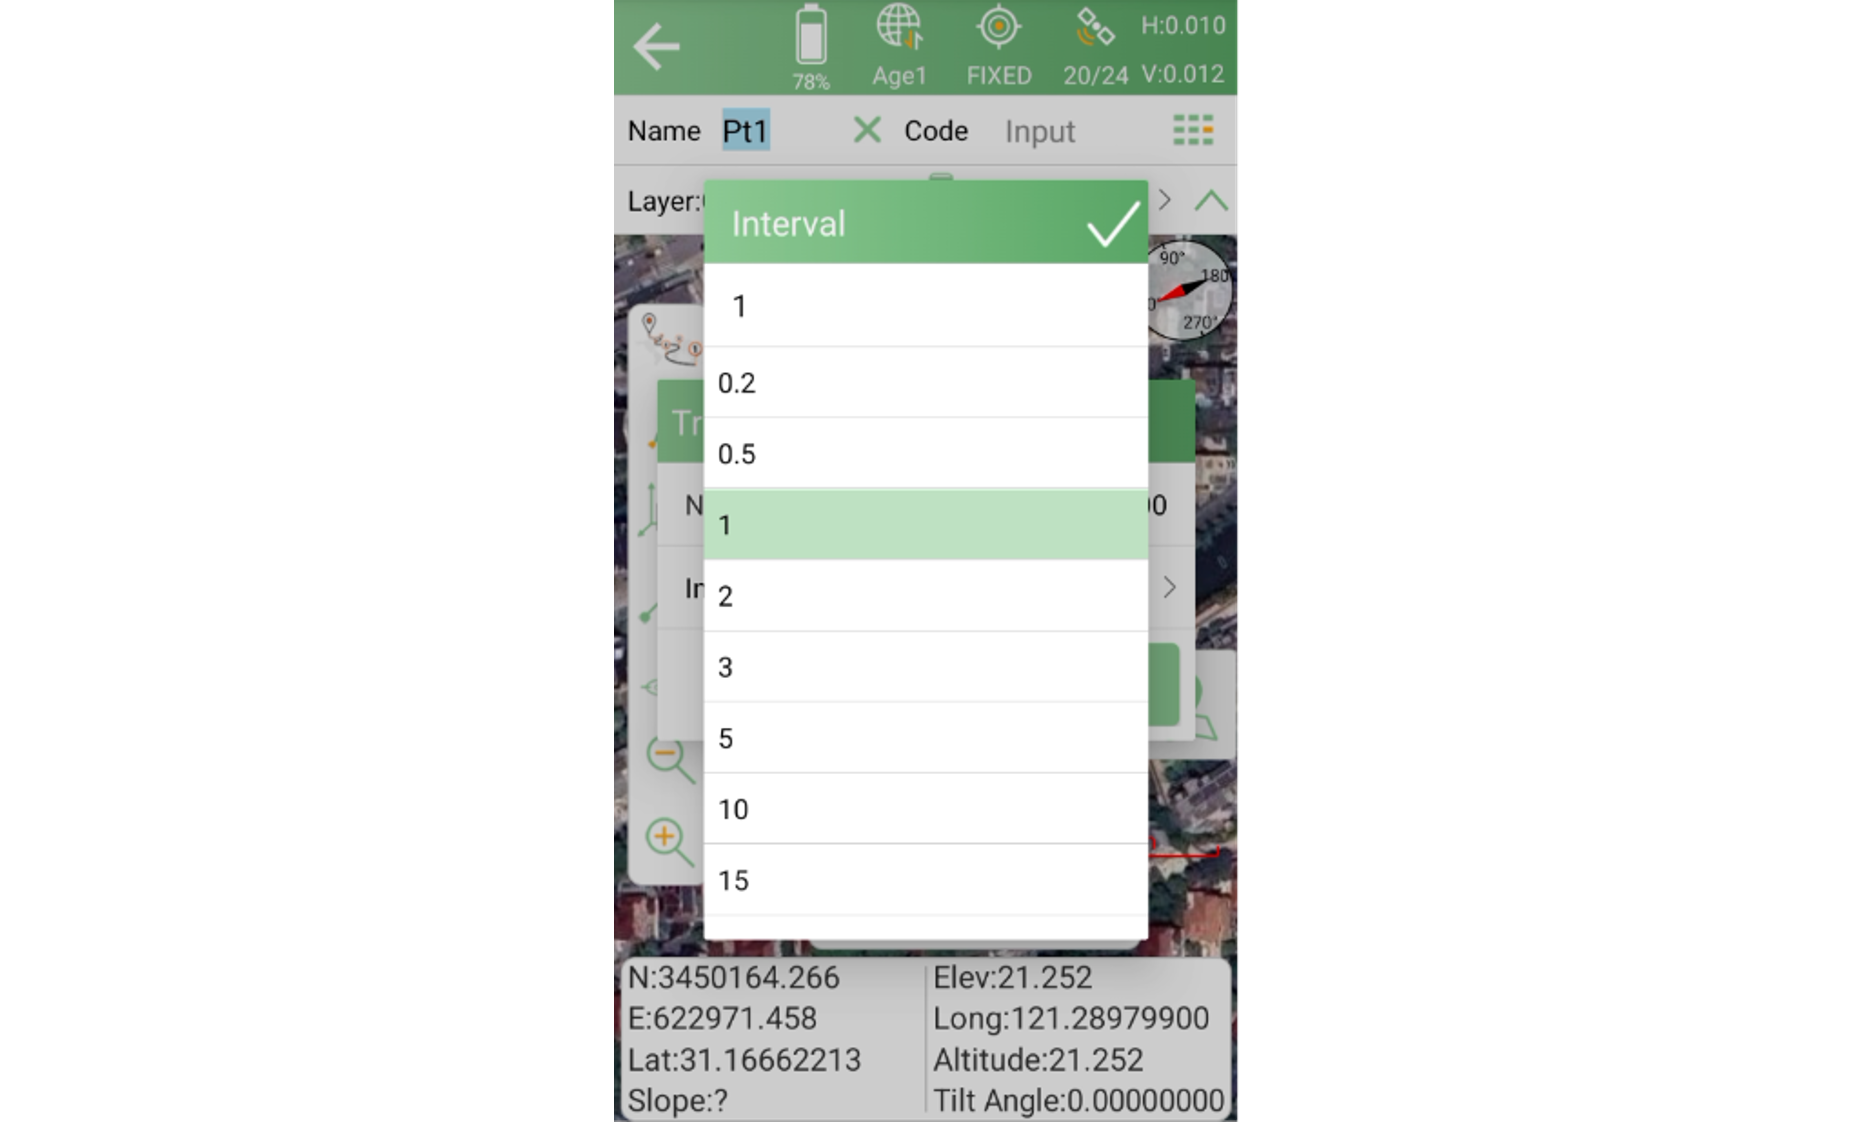
The sampling interval determines how closely the recorded path matches the actual route traveled.
Interval Type | Effect | Use Case |
Too short | Generates excessive redundant track points, increasing file size | Scenarios requiring extremely high precision |
Moderate | Balances track smoothness with file size | Daily fieldwork (recommended) |
Too long | Causes visible angular breaks in the track, deviating significantly from the actual route | Large-area, low-precision overview |
Shorter intervals produce smoother tracks but generate more data. Choose a value that best suits your specific workflow requirements.
After configuring the parameters, tap OK. The device will begin automatically recording the path according to your settings, and the track will be displayed in real time on the current map. Once enabled, the tool button will turn green.
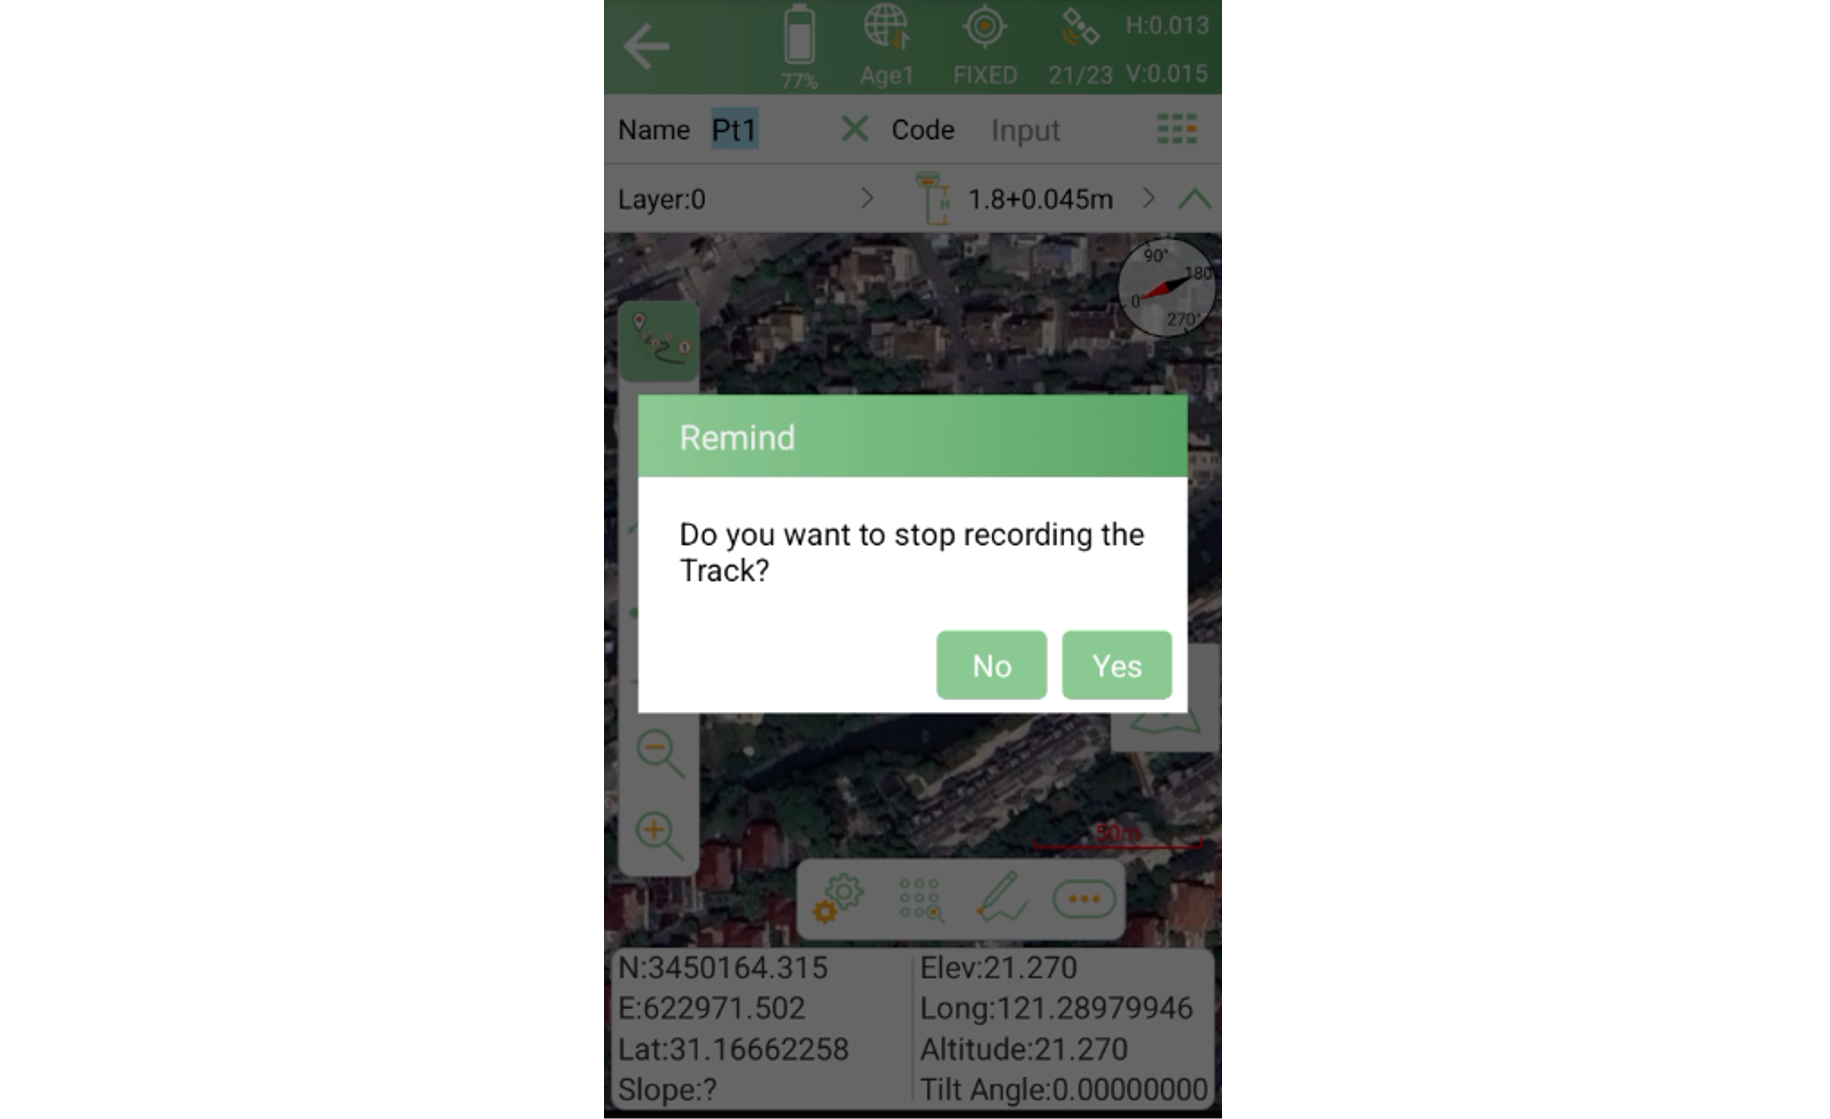
When you have finished your fieldwork and wish to stop recording, simply tap the track recording button again. A confirmation dialog will appear — tap Yes to end the recording session.
Note: Track export is a newly added feature in the latest version. If you do not see the export option in your current software version, please contact our support team to request a version update.
After recording is complete, if you wish to open the track data in other software (such as Google Earth or QGIS), follow the steps below to export your tracks.
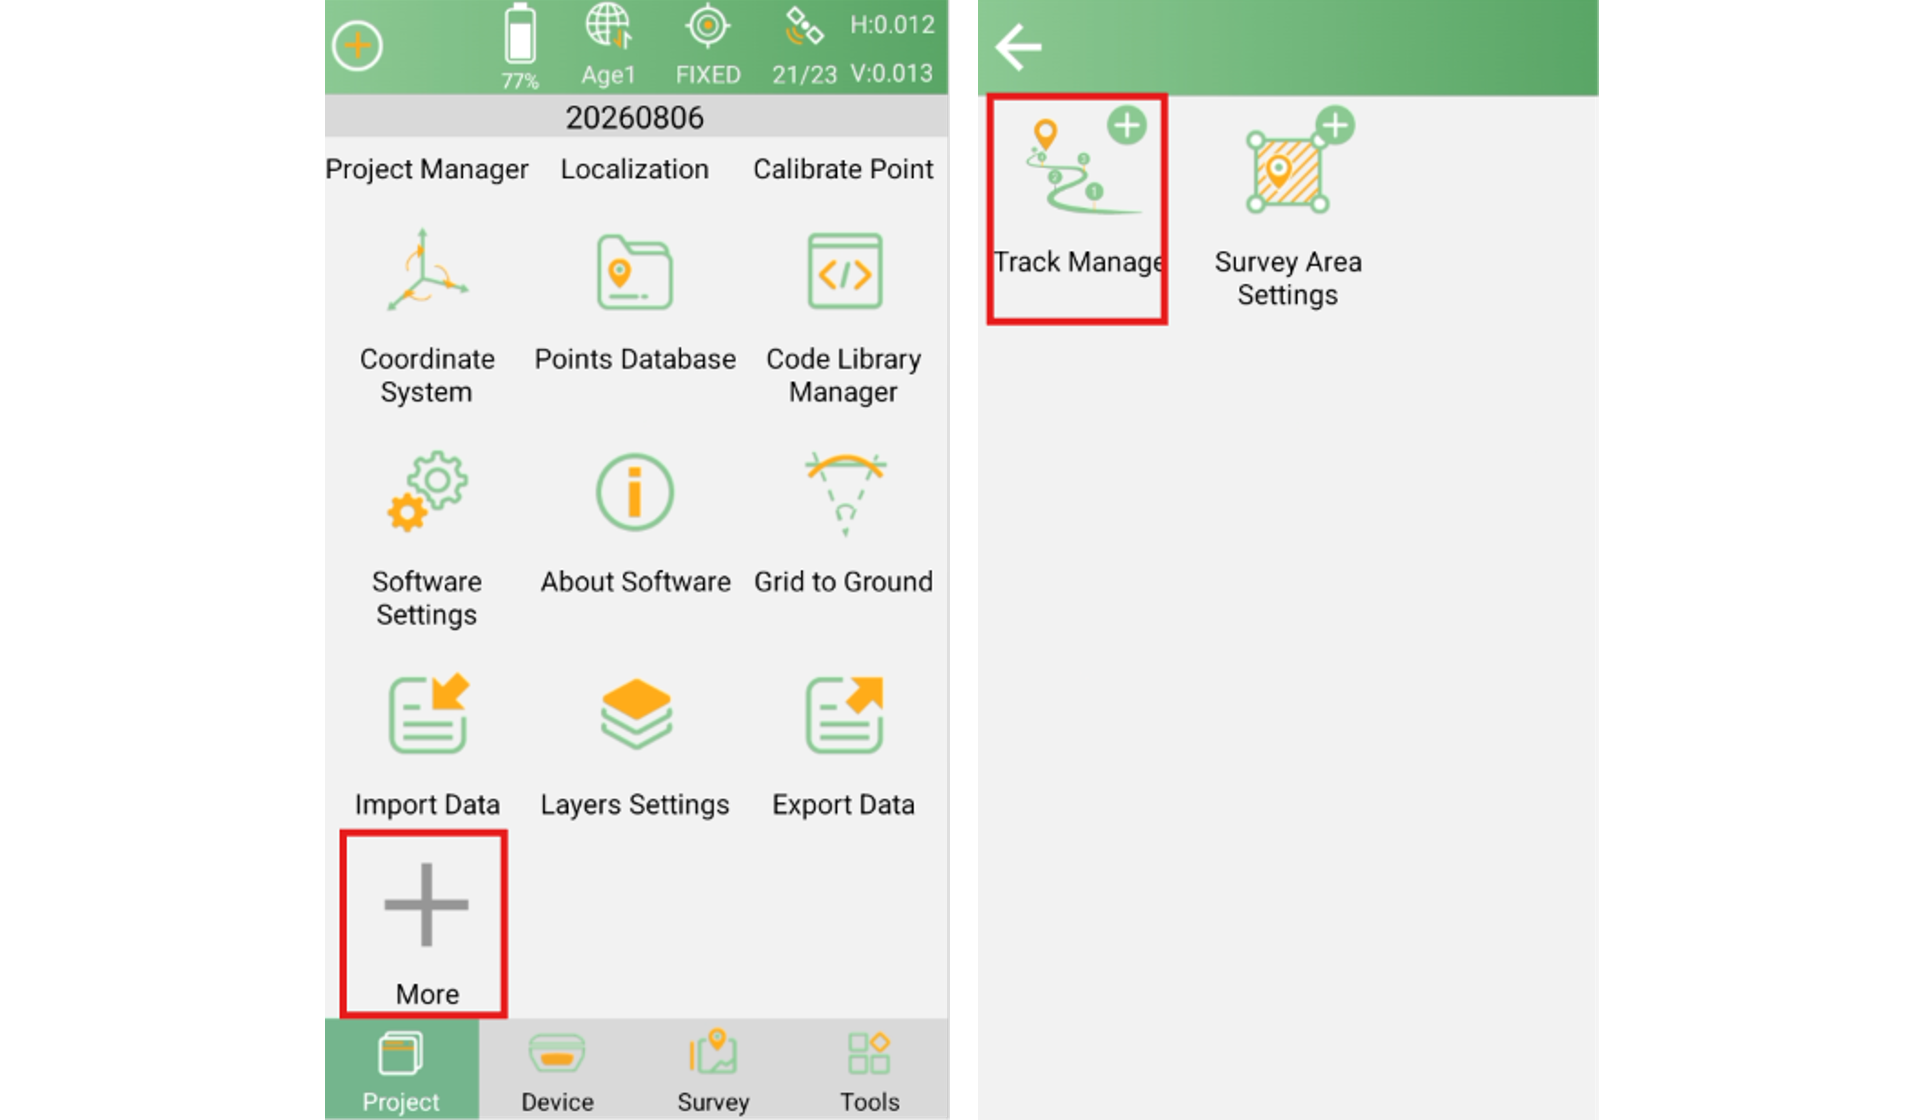
From the project interface, tap More and navigate to the Track Management page, where all recorded tracks are listed.
Select the track you wish to export to open its detail page. The page will automatically display the path details and play a preview.
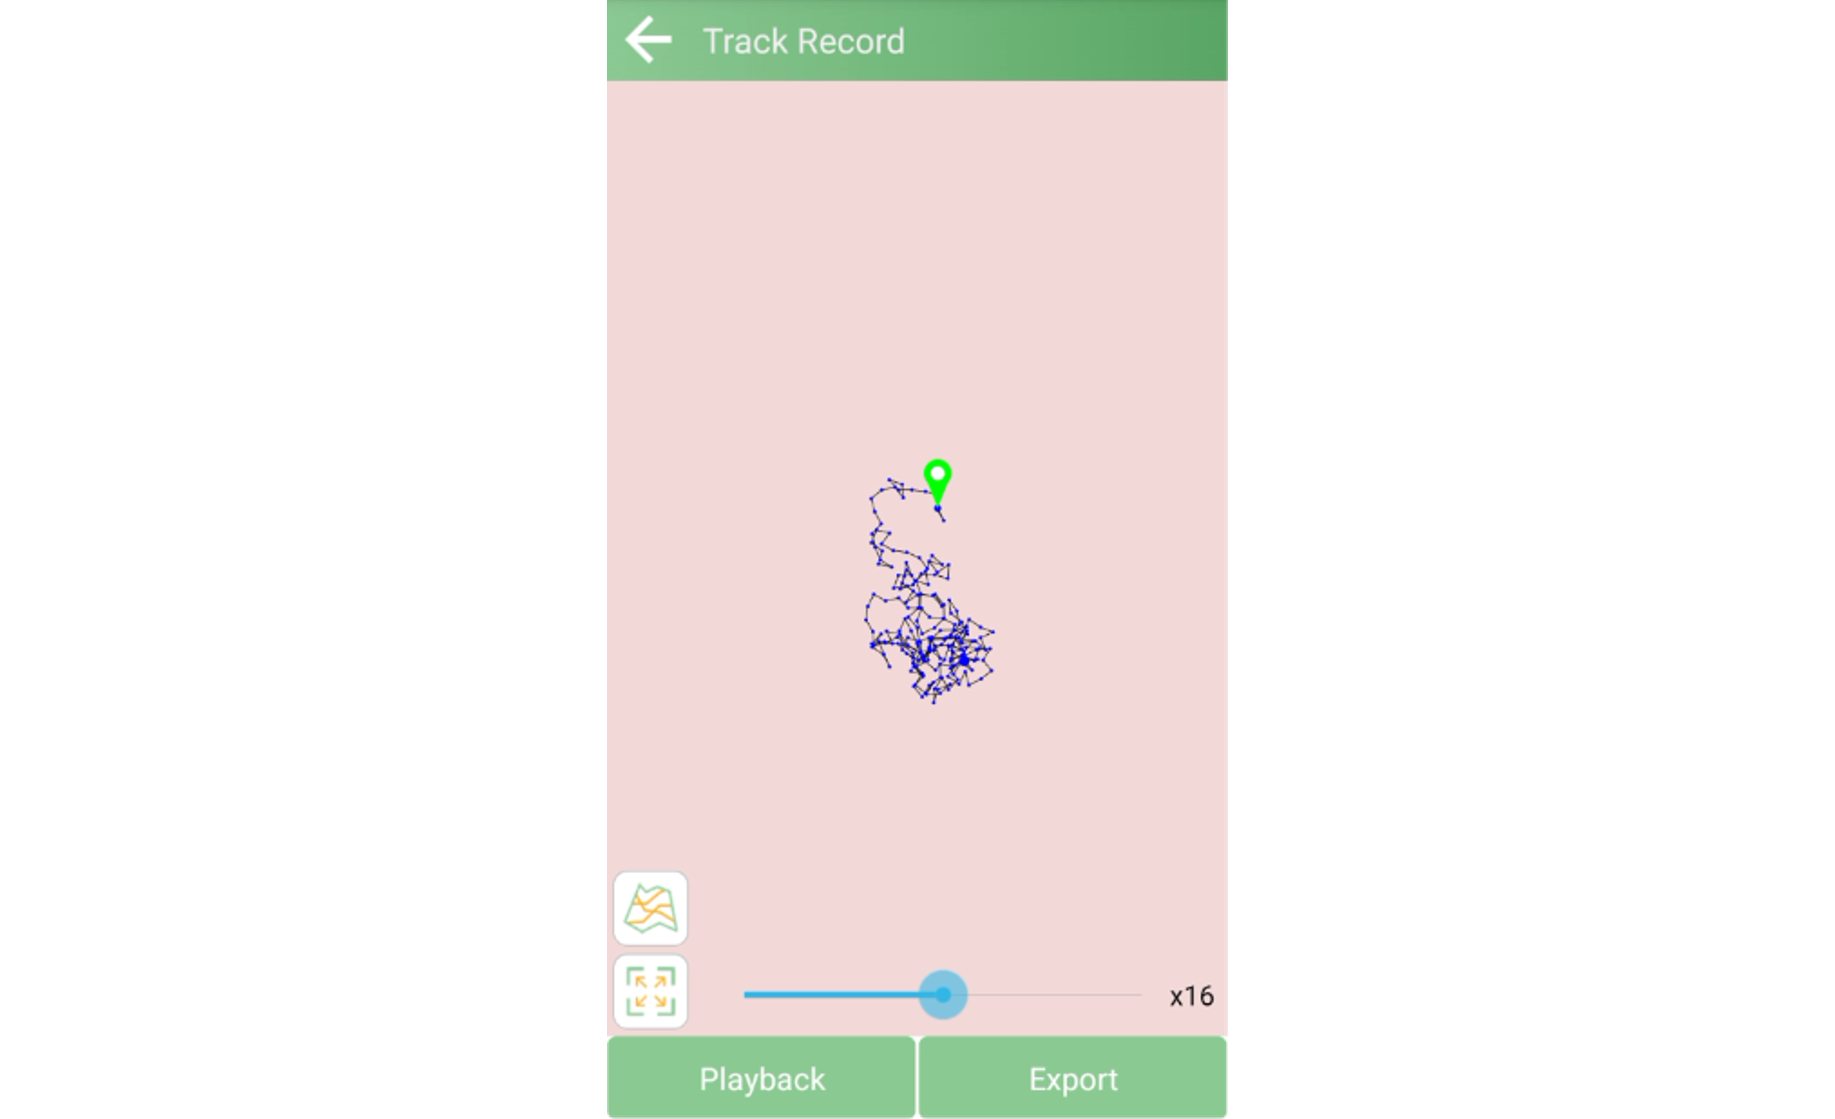
Tap Export in the lower-right corner. Three file formats are available:
Format | Description |
KML | Keyhole Markup Language — compatible with Google Earth and other GIS applications |
Plane Coordinates (TXT) | Text file containing planar coordinate values |
Lat/Lon Coordinates (TXT) | Text file containing latitude and longitude values |
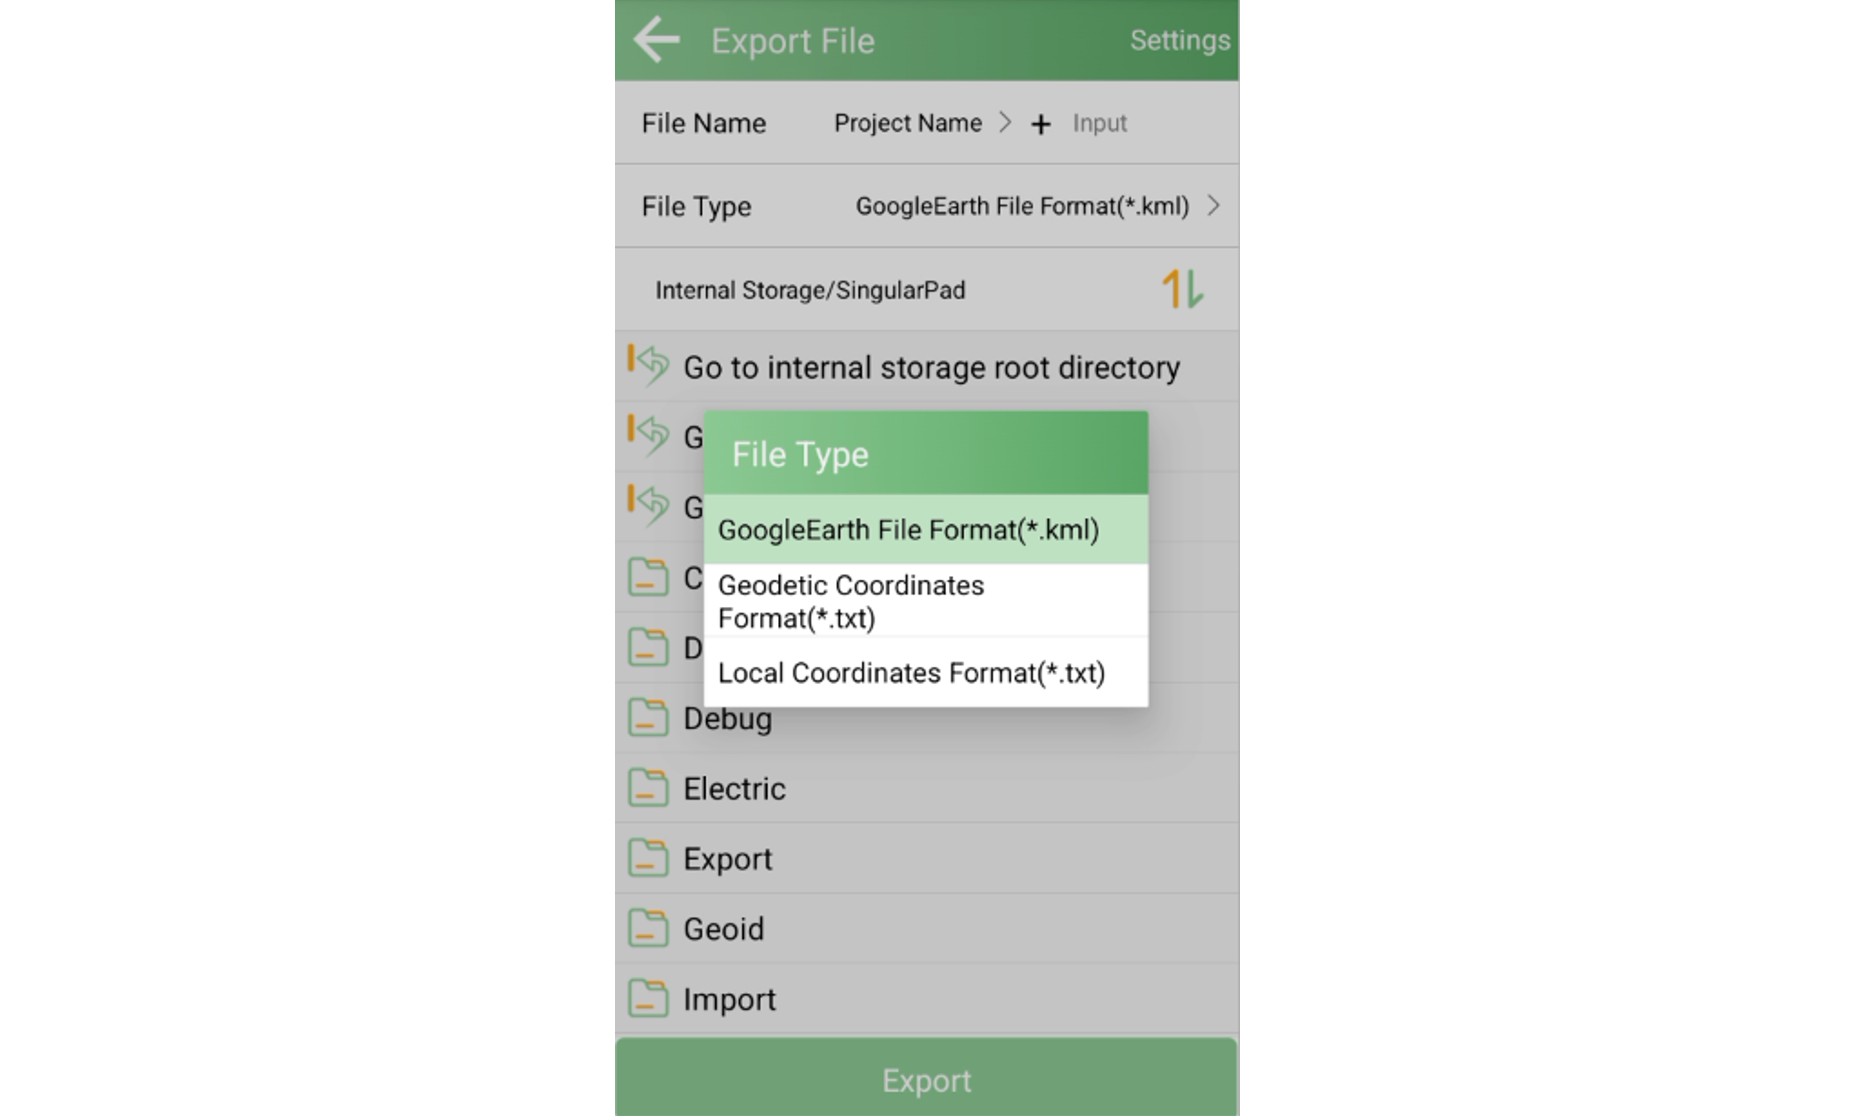
Select your desired format, then tap Export at the bottom to complete the process. The exported file can be imported into the applications mentioned above for viewing, or used for other purposes as needed.
Use descriptive track names: When configuring parameters, assign descriptive names (e.g., date + area) to quickly identify tracks in the management page.
Match the interval to your work type: 1–3 seconds for walking surveys, this avoids generating excessive redundant data.
Export and back up promptly: After fieldwork, export your tracks and back them up to a computer or cloud storage as soon as possible to prevent data loss from device issues.
Clean up exported tracks: If a project accumulates a large number of track records, delete old tracks that have already been exported from the management page to keep the list organized.
Preview before exporting: Before exporting, play the track preview on the detail page to confirm the path is complete and free of gaps before proceeding with the export.
SingularPad's track recording feature ensures that you capture not only "what was measured" but also the complete "how it was reached" workflow. By properly configuring sampling parameters and exporting data in a timely manner, you can provide more comprehensive data support for coverage verification, quality checks, and project reporting.
If you would like to use the track export feature (newly added in the latest version), or encounter any issues during configuration or use, please contact our support team to request a version update or get assistance.